Visualize the journey of an agarwood tree from a tiny seed to the world's most precious wood
What is Agarwood?
Agarwood comes from the Aquilaria tree species, a native tropical tree known in the Philippines as Lapnisan or Aquilaria malaccensis. Agarwood is a rare and fragrant resin formed in Aquilaria trees when What Is Inoculation in Agarwood Trees?Inoculation is a man-made way of helping an agarwood tree produce resin. Farmers gently wound the trunk and add special fungi, natural acids, or organic substances. This “controlled stress” activates the tree’s immune system, causing it to create the dark, fragrant resin that eventually becomes agarwood (oud).Think of it as guiding the tree to do what it naturally does in the wild — but in a safer, faster, and more predictable way.How Inoculation Works (Simple Breakdown)1Wounding the TreeWorkers drill small holes or make shallow cuts in the trunk of a mature Aquilaria tree. This is usually done when the tree is 4 to 8 years old, the ideal age for resin development.2Adding the InducerA liquid or solid mixture — often containing helpful fungi or natural chemicals — is placed into the holes. This acts as the “trigger” for the tree’s defense response.3Resin FormationThe tree reacts by protecting itself. It sends thick, dark resin to the wounded areas, slowly turning the wood around the holes into valuable agarwood.4Harvesting the Resin-Rich WoodAfter 1 to 3 years, the resin has matured. Farmers then harvest the treated sections and process them into oil, incense, or carved pieces.. With deep roots in the Agarwood in the BibleIn the Bible, agarwood is referred to as “aloes” (derived from the Greek agallochum, a loanword for the Sanskrit agaru). It is always described as a rare, highly precious luxury item used for royal perfumes, sacred items, and burial spices.Below are some examples where aloes or agarwood was mentioned in the Bible:1The Book of NumbersThe prophet Balaam looks out over the tents of Israel and uses the beauty of the Aquilaria trees planted by God as a metaphor for Israel’s thriving future.Like valleys they spread out, like gardens beside a river, like aloes planted by the LORD, like cedars beside the waters. — Numbers 24:6 (NABRE) Source (opens in a new tab)2The Book of PsalmsA royal wedding song celebrating the messianic King. Agarwood is listed among the elite royal perfumes used to scent the King’s wedding garments.With myrrh, aloes, and cassia your robes are fragrant. From ivory-paneled palaces stringed instruments bring you joy. — Psalm 45:9 (NABRE) Source (opens in a new tab)3The Book of ProverbsSolomon describes a seductive woman preparing her bed with the most alluring and exotic imported spices available in the ancient world.I have sprinkled my bed with myrrh, with aloes, and with cinnamon. — Proverbs 7:17 (NABRE) Source (opens in a new tab)4The Song of SongsThe groom praises his bride, comparing her beauty, purity, and fragrance to a private garden filled with the world’s most valuable exotic plants.nard and saffron, calamus and cinnamon, with every kind of incense tree, with myrrh and aloes and all the finest spices. — Song of Songs 4:14 (NABRE) Source (opens in a new tab)5The Gospel According to JohnFollowing the crucifixion of Jesus Christ, Nicodemus brings an immense, highly expensive quantity of burial spices to wrap Jesus’ body according to royal Jewish burial customs.Nicodemus, the one who had first come to him at night, also came bringing a mixture of myrrh and aloes weighing about one hundred pounds. — John 19:39 (NABRE) Source (opens in a new tab) and Quran, agarwood or oud - including Lapnisan and several other Philippine native aquilaria tree species - is a botanical miracle prized for incense, luxury perfumes, and traditional medicine.
Scroll to begin
The Genesis of Agarwood
Interactive Agarwood Cultivation Model · Dendrotonics
01
Phase 01 of 07 · 0:00 – 0:02
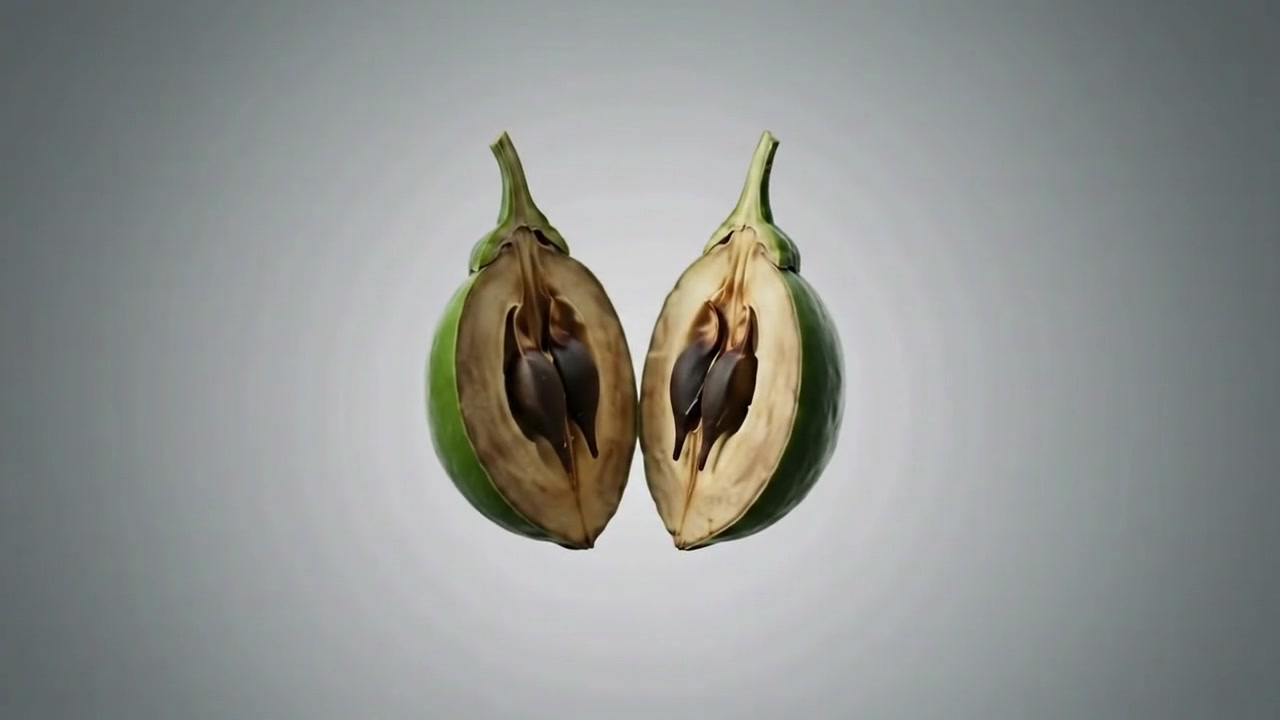
Seed Selection & Pod Morphology
Where a ₱1M tree begins: a capsule that stays viable for eleven days.
Scroll to play · scroll up to rewind | Click the dots for botanical science
Phase 01 of 07 · 0% scrubbed
A field guide for the curious
Agarwood, from the beginning
What the resin is, which trees make it, why six of those trees exist only in the Philippines, and how a plantation persuades a tree to produce it.
Start here
Agarwood: A Deep Dive Primer
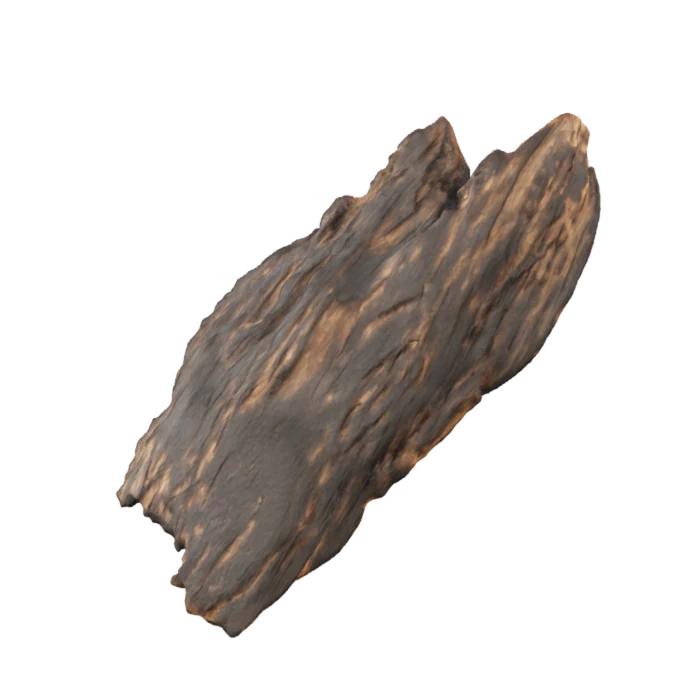
Agarwood is a dark, fragrant resin that forms inside Aquilaria trees — known in the Philippines as lapnisan. It is not the wood itself. Healthy Aquilaria wood is pale and nearly odourless; agarwood exists and develops only where the tree has been wounded, showcasing the native tree's resilience by forming a defensive response to fungal infection and colonisation, and has answered by flooding the injury with aromatic resin.
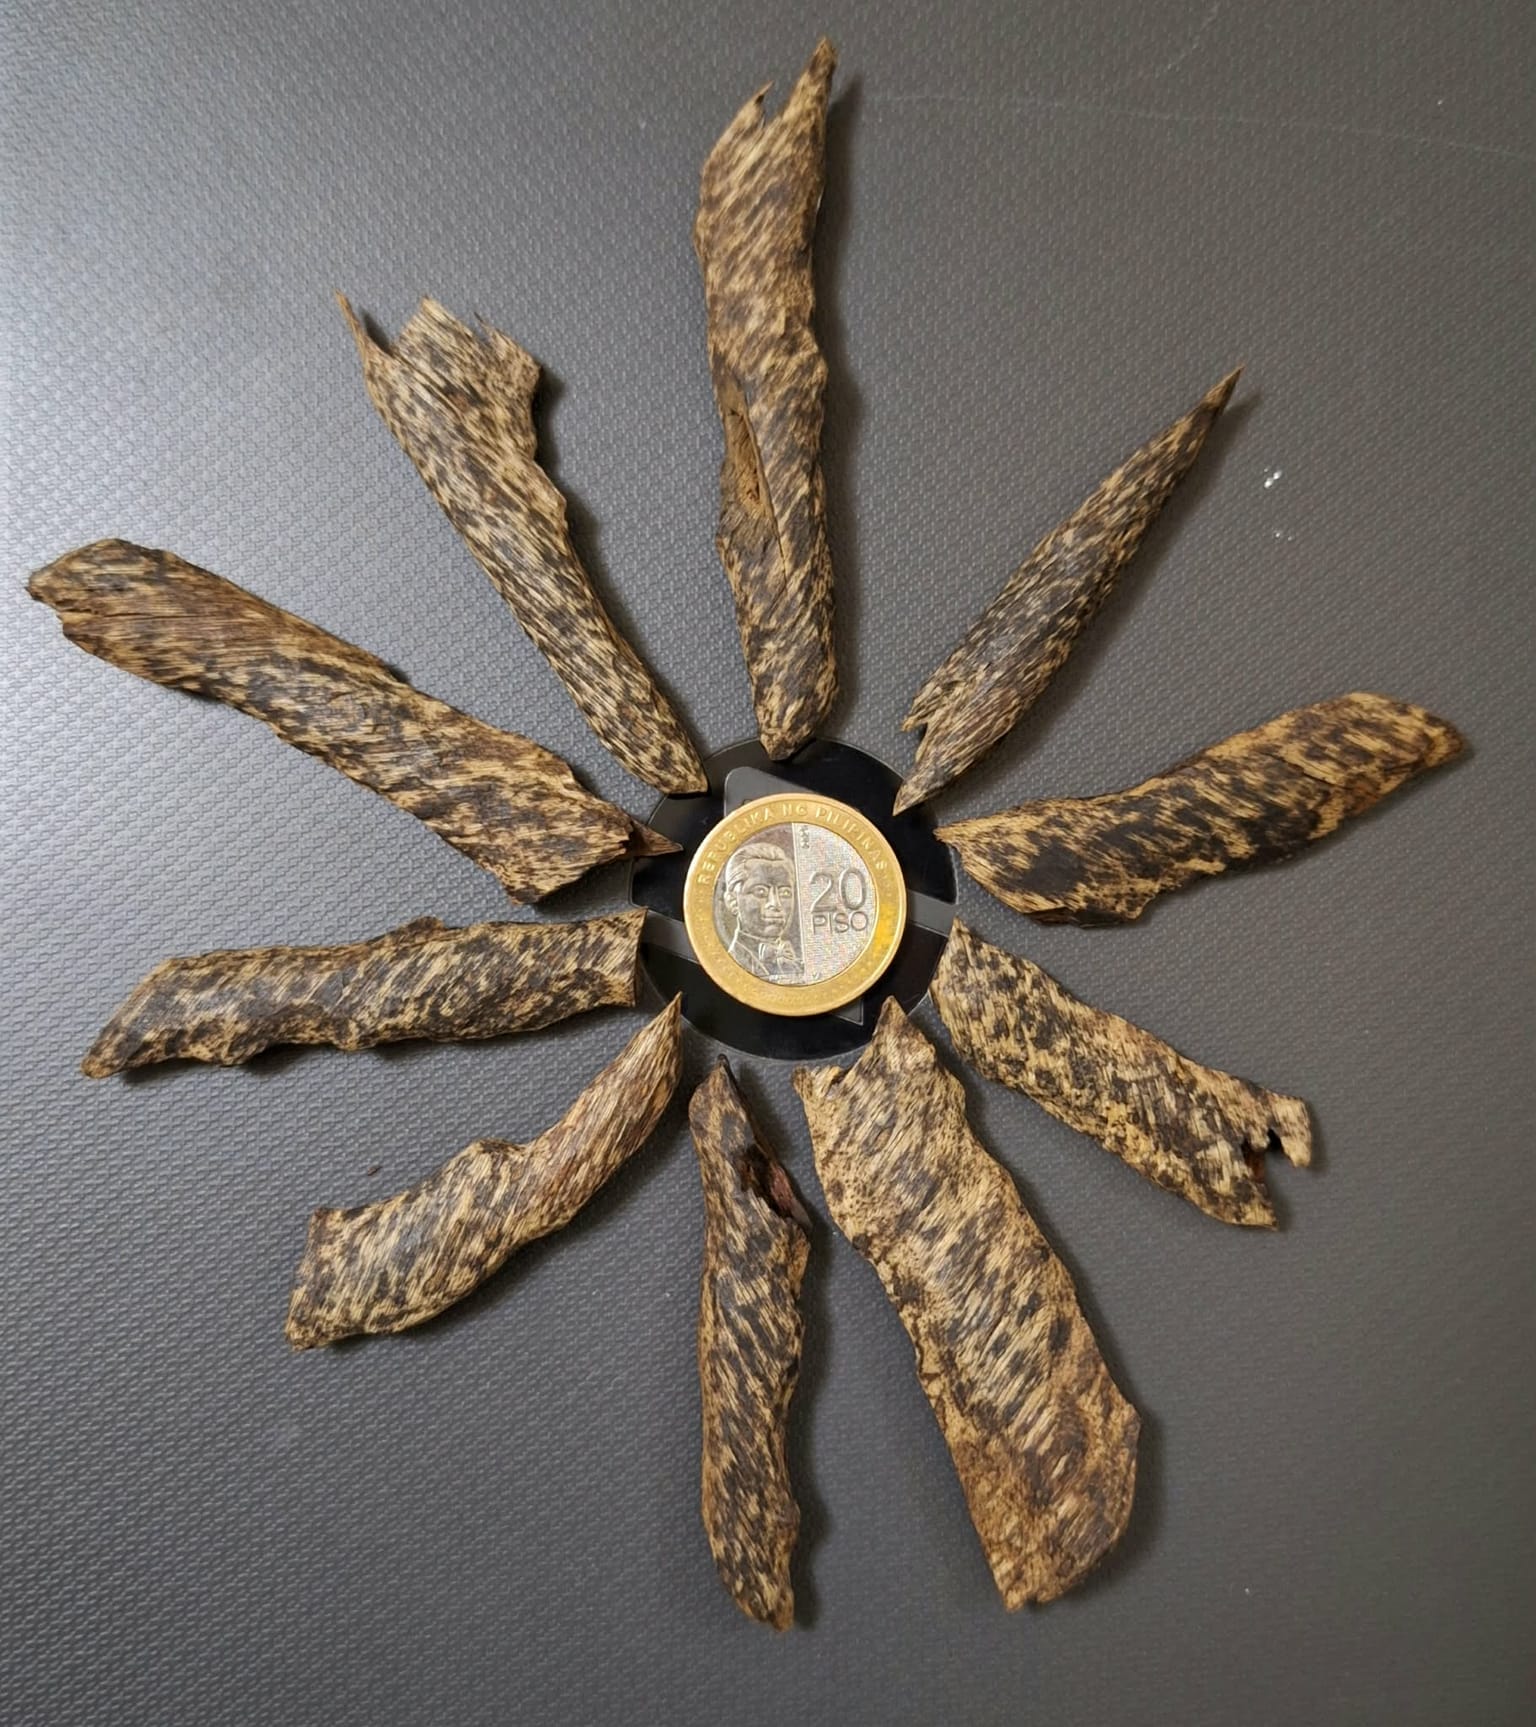
Graded agarwood chips, arranged around a ₱20 coin for scale. The dark streaks are the resin; the pale grain between them is ordinary Aquilaria wood.
That resin is what the world calls oud or the "wood of the Gods". Graded by how much resin it holds — the densest pieces sink in water — it is among the most valuable raw materials on Earth, traded by the gram for perfumery, incense, carving and traditional medicine.
Philippine species
The nine Aquilaria species of the Philippines
The Department of Environment and Natural Resources and the botanical literature recognise nine Aquilaria species occurring in the Philippines: six endemic species found nowhere else in the world, and three native species the country shares with its neighbours.
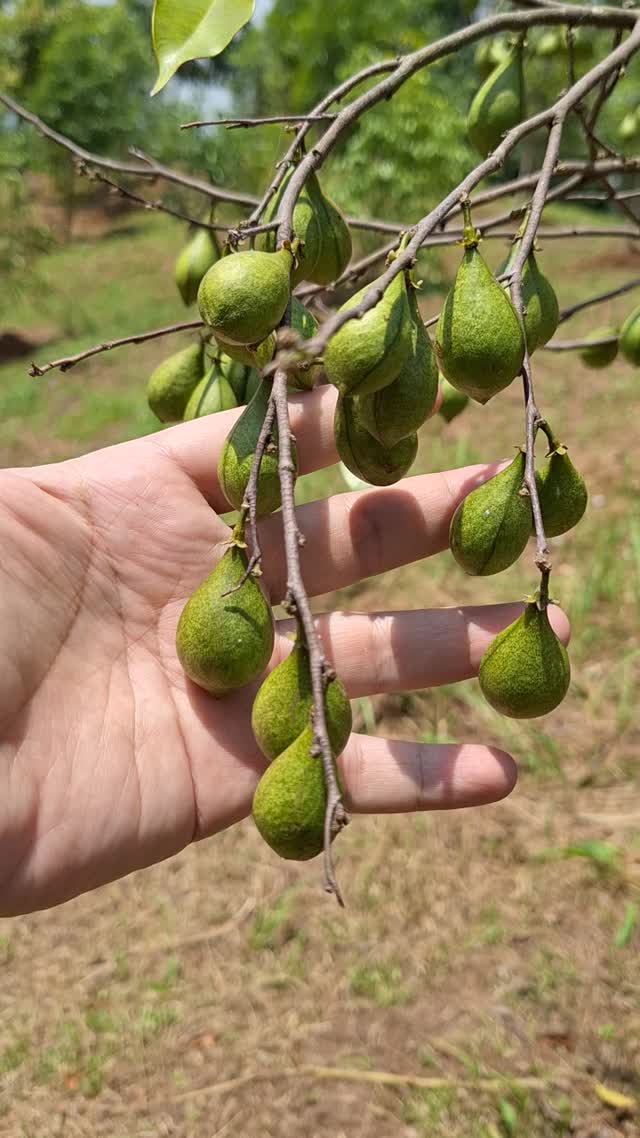
Aquilaria in fruit. Each capsule splits along one seam and holds one or two seeds — which stay viable for days, not months.
Endemic — found only in the Philippines
Six species in this genus exist nowhere else. Their names are worth reading slowly: most describe the plant itself. Swipe through them.
Endemic
Mangod
Aquilaria apiculataMerr.
Apiculata means “with a small sharp point” — the tip of its leaf.
Endemic
Binukat
Aquilaria brachyantha(Merr.) Hallier f.
Brachyantha means “short-flowered”.
Endemic
Agododan
Aquilaria citrinicarpa(Elmer) Hallier f.
Citrinicarpa means “citron-fruited”, for the colour of its capsule.
Endemic
Aquilaria decemcostata
Aquilaria decemcostataHallier f.
Decemcostata means “ten-ribbed”, for the veining of its fruit.
Endemic
Butlong Liitan
Aquilaria parvifolia(Quisumb.) Ding Hou
Parvifolia means “small-leaved” — and the local name says the same thing.
Endemic
Makolan
Aquilaria urdanetensis(Elmer) Hallier f.
Named for Mount Urdaneta in Mindanao, where it was first described.
Native — also found in neighbouring countries
1
Aquilaria cumingiana(Decne.) Ridl.
ButloPalisan
Named for Hugh Cuming, the 19th-century naturalist whose Philippine collections seeded herbaria across Europe.
2
Aquilaria filaria(Oken) Merr.
Lapisan
Shared with eastern Indonesia and New Guinea.
3
Aquilaria malaccensisLam.
LapnisanBariCritically Endangered
The most prized agarwood-producing species in the country, and the most threatened.
Lapnisan: the most prized of the nine
The best and most prized variety of agarwood in the Philippines is Aquilaria malaccensis, locally known as lapnisan. Wild-harvested lapnisan from deep tropical forest produces a dense, highly resinous dark heartwood — the source of top-grade oud oil and incense chips that rank among the finest anywhere in the world.
What sets Philippine lapnisan apart
Species:
Aquilaria malaccensis, widely considered the “king of agarwood”.
Aroma:
Deep, rich and long-lasting, with the sweet and woody notes most valued in Middle Eastern and luxury international fragrance markets.
Source quality:
Old-growth wild trees — increasingly rare, and strictly protected — carry a higher resin density than young plantation-grown trees. Dendrotonics is working to close that gap to produce high-qualty Grade A agarwood with our proprietary inoculation technology and timber plantation best practices.
Where to grow Lapnisan:
Ideally, sea level to 800 m, 1,500–2,500 mm rainfall with no prolonged dry season, pH 5.5–6.5, slope 5–25%. Dendrotonics has adapted and grown agarwood across the country with any soil type, except flooded and salty sandy beaches.
Regulation and sourcing
Legal compliance:
Wild harvesting is heavily restricted under Philippine wildlife law.
Inoculation is a man-made way of helping an agarwood tree produce resin. Farmers gently wound the trunk and add special fungi, natural acids, or organic substances. This “controlled stress” activates the tree’s immune system, causing it to create the dark, fragrant resin that eventually becomes agarwood (oud).
Think of it as guiding the tree to do what it naturally does in the wild — but in a safer, faster, and more predictable way.
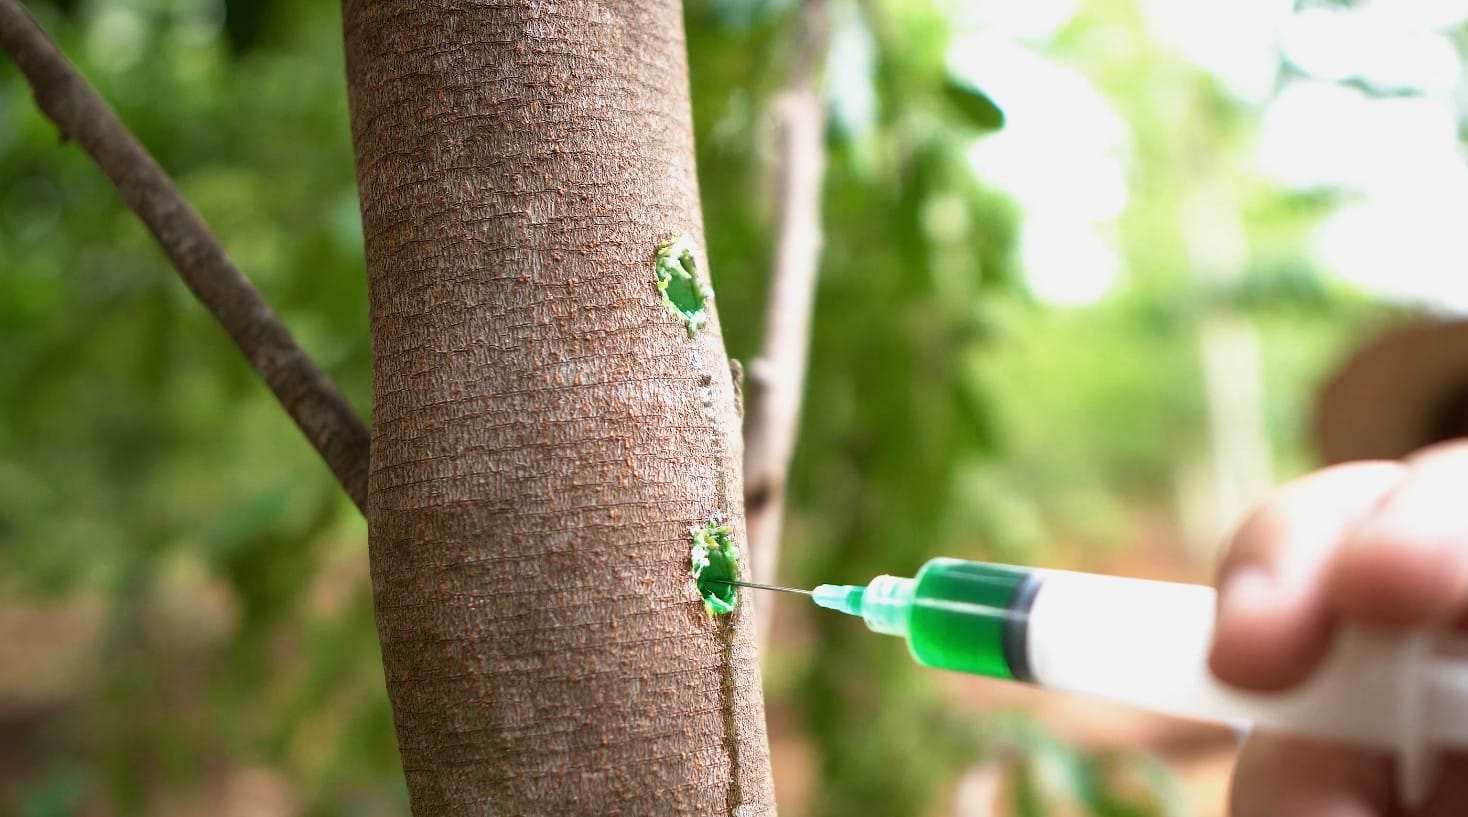
Filipino-made inoculant going into a bore hole. Each hole is sealed afterwards with antiseptic beeswax.
How inoculation works (simple breakdown)
1Wounding the treeWorkers drill small holes or make shallow cuts in the trunk of a mature Aquilaria tree. This is usually done when the tree is 4 to 8 years old, the ideal age for resin development.
2Adding the inducerA liquid or solid mixture — often containing helpful fungi or natural chemicals — is placed into the holes. This acts as the “trigger” for the tree’s defense response.
3Resin formationThe tree reacts by protecting itself. It sends thick, dark resin to the wounded areas, slowly turning the wood around the holes into valuable agarwood.
4Harvesting the resin-rich woodAfter 1 to 3 years, the resin has matured. Farmers then harvest the treated sections and process them into oil, incense, or carved pieces.
Why everyone in the world wants it
How agarwood is used
Almost every gram of agarwood ends up in one of four places. Grade decides which: sinking-grade wood is carved or burned whole, while lower grades are distilled.
Incense
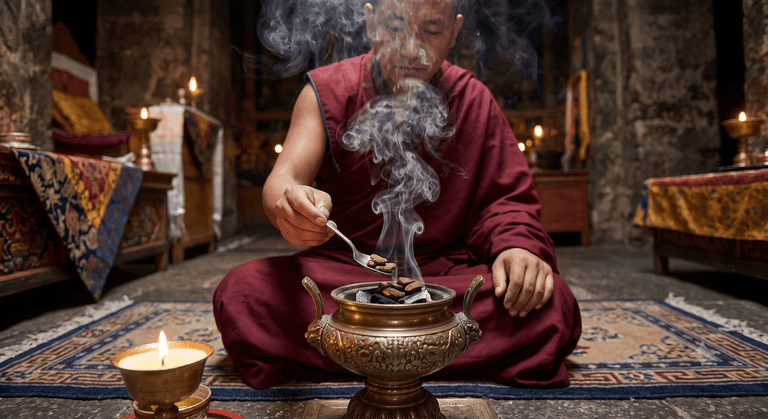
Burned as chips or powder in temples, mosques and homes across Asia and the Gulf, where the smoke marks hospitality and prayer alike.
Perfumery
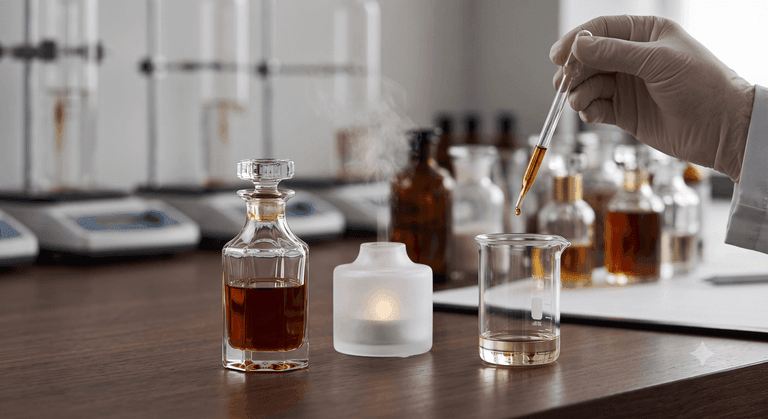
Distilled into oud oil — one of the most expensive perfume ingredients in the world, and the backbone of Middle Eastern fragrance.
Carving and collecting
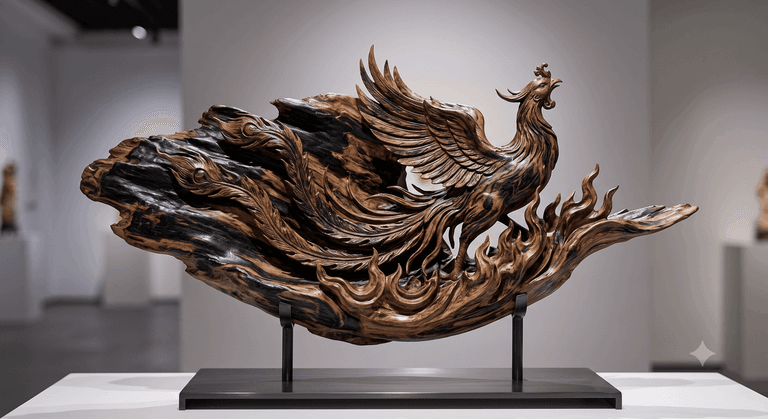
The densest, most figured pieces are never burned at all. They are carved into beads and sculpture, or kept whole as collector’s pieces.
Traditional medicine
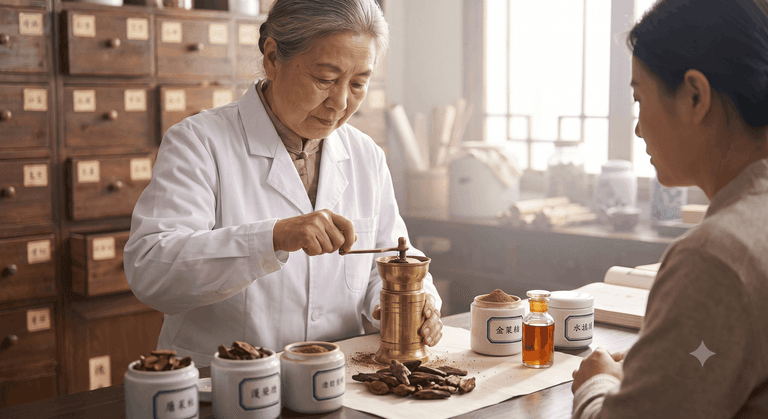
Used for centuries in Ayurvedic, Chinese and Unani practice, and still a component of traditional preparations across South and Southeast Asia.
Three thousand years
History and significance
Agarwood — also known as aloeswood or oud — has been treasured for thousands of years across Asia and the Middle East for its fragrance, its ritual importance and its medicinal use.
Ancient trade routes carried it a very long way. The Silk Road and the Indian Ocean networks moved agarwood from Southeast Asia to Arabia, Egypt and the Mediterranean, where it became bound up with luxury, sanctity and spiritual devotion.Reference 1BMV Fragrances. (2025, October 7). Oudh oil through the ages: How agarwood became a global luxury icon. BMV Fragrances.
In the Middle East, oud shaped religious and social life for more than three thousand years — burned in mosques, in royal courts and in daily ritual, precisely because it was rare and its aroma was deep and complex.Reference 2Oudimentary. (2026, August 13). Origins of oud in Middle Eastern history. Oudimentary.
Agarwood also appears in several biblical passages, reflecting its high value in ancient Jewish and early Christian traditions. In the Book of Numbers, Balaam compares the tents of Israel to “aloes planted by the Lord”, an image of divine blessing and prosperity. The Song of Solomon lists aloes among the finest spices, in a register of romance, beauty and opulence. Most striking is the Gospel of John, where Nicodemus brings a large mixture of myrrh and aloes to prepare Jesus’ body for burial — an act of reverence that shows what agarwood meant in funerary rites.Reference 3DivineNarratives Team. (2024, July 2). Biblical and historical insights into lign aloes usage. DivineNarratives.Reference 4Precept Austin. (n.d.). Numbers 24 commentary. Precept Austin. Open source (opens in a new tab)Reference 5Jewish Virtual Library. (n.d.). Tehillim (Psalms) chapter 45. American-Israeli Cooperative Enterprise. Open source (opens in a new tab)
Where aloes appear in Scripture
The Book of Numbers
The prophet Balaam looks out over the tents of Israel and uses the beauty of the Aquilaria trees planted by God as a metaphor for Israel’s thriving future.
Like valleys they spread out, like gardens beside a river, like aloes planted by the LORD, like cedars beside the waters.
The Book of Psalms
A royal wedding song celebrating the messianic King. Agarwood is listed among the elite royal perfumes used to scent the King’s wedding garments.
With myrrh, aloes, and cassia your robes are fragrant. From ivory-paneled palaces stringed instruments bring you joy.
The Book of Proverbs
Solomon describes a seductive woman preparing her bed with the most alluring and exotic imported spices available in the ancient world.
I have sprinkled my bed with myrrh, with aloes, and with cinnamon.
The Song of Songs
The groom praises his bride, comparing her beauty, purity, and fragrance to a private garden filled with the world’s most valuable exotic plants.
nard and saffron, calamus and cinnamon, with every kind of incense tree, with myrrh and aloes and all the finest spices.
The Gospel According to John
Following the crucifixion of Jesus Christ, Nicodemus brings an immense, highly expensive quantity of burial spices to wrap Jesus’ body according to royal Jewish burial customs.
Nicodemus, the one who had first come to him at night, also came bringing a mixture of myrrh and aloes weighing about one hundred pounds.
Agarwood in the Manila Galleon trade
During the Manila Galleon era (1565–1815), agarwood — known locally as lapnisan — was one of the prized forest commodities shipped from the Philippines to New Spain (Mexico). Spanish trade records and ethnobotanical studies note “aloeswood from the islands” travelling alongside silk, spices and ivory, valued for perfumery, religious ritual and medicinal preparation across Asia and the Americas.Reference 6Blair, E., & Robertson, J. A. (Eds.). (1903–1909). The Philippine Islands, 1493–1898 (Vols. 1–55). Cleveland, OH: Arthur H. Clark Company.Primary source compilation documenting Spanish colonial trade, including forest products such as aloeswood.Reference 7Schurz, W. L. (1939). The Manila Galleon. New York, NY: E. P. Dutton.Classic historical work detailing commodities traded between the Philippines and Mexico.
Its appearance on galleon cargo lists puts Philippine forest products inside one of the world’s first genuinely global trade systems — two and a half centuries of Pacific crossings that moved this wood, and the money it commanded, between three continents.Reference 8Bankoff, G. (2007). Forest cultures: The evolution of a conservation ethic in the Philippines. Environmental History, 12(1), 125–135.Discusses Philippine forest products and their role in colonial economies.
Chinese, Arab and Mexican elites all wanted it, and that demand made agarwood a cultural luxury linking Philippine forests to international markets long before modern perfumery popularised the word oud.Reference 9Scott, W. H. (1994). Barangay: Sixteenth-century Philippine culture and society. Quezon City, Philippines: Ateneo de Manila University Press.Context on pre-colonial and early colonial trade goods, including aromatic woods.
What the world calls it
One resin, a different name in every market that ever wanted it. The names are worth knowing: they are what buyers search for, and several of them describe the grade rather than the wood.
One resin, nine names. Every name on the map is written out below, with what it means.
Agarwood around the world
Middle East — Oud / Oudh:
The region is the world’s largest importer of natural agarwood and oud oil; the English word oud is borrowed straight from the Arabic.
China — Chen Xiang (沉香):
“Sinking fragrance” — the name is the grading test: high-grade agarwood sinks in water.
Japan — Jinkō (沈香) and Kyara:
The same characters read differently. Kyara is the highest grade and sits at the centre of kōdō, the Japanese Way of Incense.
Korea — Chamhyang (침향):
Used in temple incense and traditional ceremonies.
India — Agar / Aguru:
Named in ancient Ayurvedic and Sanskrit texts; the English “agarwood” descends from it.
Malay-speaking Southeast Asia — Gaharu:
The common trade term across Malaysia, Indonesia and Brunei.
Vietnam — Trầm Hương / Kỳ Nam:
Kỳ nam (kinam) is considered the rarest and most valuable agarwood of all. Kynam is found in the wild and densest forests of central Vietnam, and is prized for its high resin content and unique fragrance.
Philippines — Lapnisan:
Historically traded during the Manila Galleon era, Lapnisan is the local name for Aquilaria malaccensis, the most prized agarwood species in the country. It is also dubbed as "the king of agarwood" for its high resin content and aromatic quality and is valued highly in the Middle East and international markets for incense.
Europe and the United States — Eaglewood:
The name "eaglewood" for agarwood comes from a linguistic mix-up in medieval Europe. Traders and writers phonetically misheard the South Asian and Tamil-Malayalam word for the wood (aghil) as the Medieval Latin word for eagle (aquila). This turned lignum aquila or agilawood into "eaglewood" in English.
References
1.BMV Fragrances. (2025, October 7). Oudh oil through the ages: How agarwood became a global luxury icon. BMV Fragrances.
2.Oudimentary. (2026, August 13). Origins of oud in Middle Eastern history. Oudimentary.
3.DivineNarratives Team. (2024, July 2). Biblical and historical insights into lign aloes usage. DivineNarratives.
4.Precept Austin. (n.d.). Numbers 24 commentary. Precept Austin. Link
6.Blair, E., & Robertson, J. A. (Eds.). (1903–1909). The Philippine Islands, 1493–1898 (Vols. 1–55). Cleveland, OH: Arthur H. Clark Company. Primary source compilation documenting Spanish colonial trade, including forest products such as aloeswood.
7.Schurz, W. L. (1939). The Manila Galleon. New York, NY: E. P. Dutton. Classic historical work detailing commodities traded between the Philippines and Mexico.
8.Bankoff, G. (2007). Forest cultures: The evolution of a conservation ethic in the Philippines. Environmental History, 12(1), 125–135. Discusses Philippine forest products and their role in colonial economies.
9.Scott, W. H. (1994). Barangay: Sixteenth-century Philippine culture and society. Quezon City, Philippines: Ateneo de Manila University Press. Context on pre-colonial and early colonial trade goods, including aromatic woods.
Genesis
Why the Philippines is Blessed with Agarwood
Philippine tropical rainforests sits inside the ecological window Aquilaria species thrives at: warm year-round, humid, with the deep well-drained soils these trees root into. That is why nine species turn up here and six evolved here — and why plantation-grown agarwood is a serious proposition for the country rather than a curiosity.
Scientific assessments show that the country hosts multiple native Aquilaria species—including A. malaccensis and A. cumingiana—which thrive in the humid, Indo‑Malesian climate zone that stretches across Southeast Asia. Philippine forests provide the warm temperatures, high rainfall, and specific microclimates that Aquilaria trees need, particularly areas with distinct diurnal temperature ranges and seasonal precipitation patterns. These environmental factors strongly influence where Aquilaria can survive, and studies confirm that the Philippines naturally contains several high‑suitability habitats across its islands.
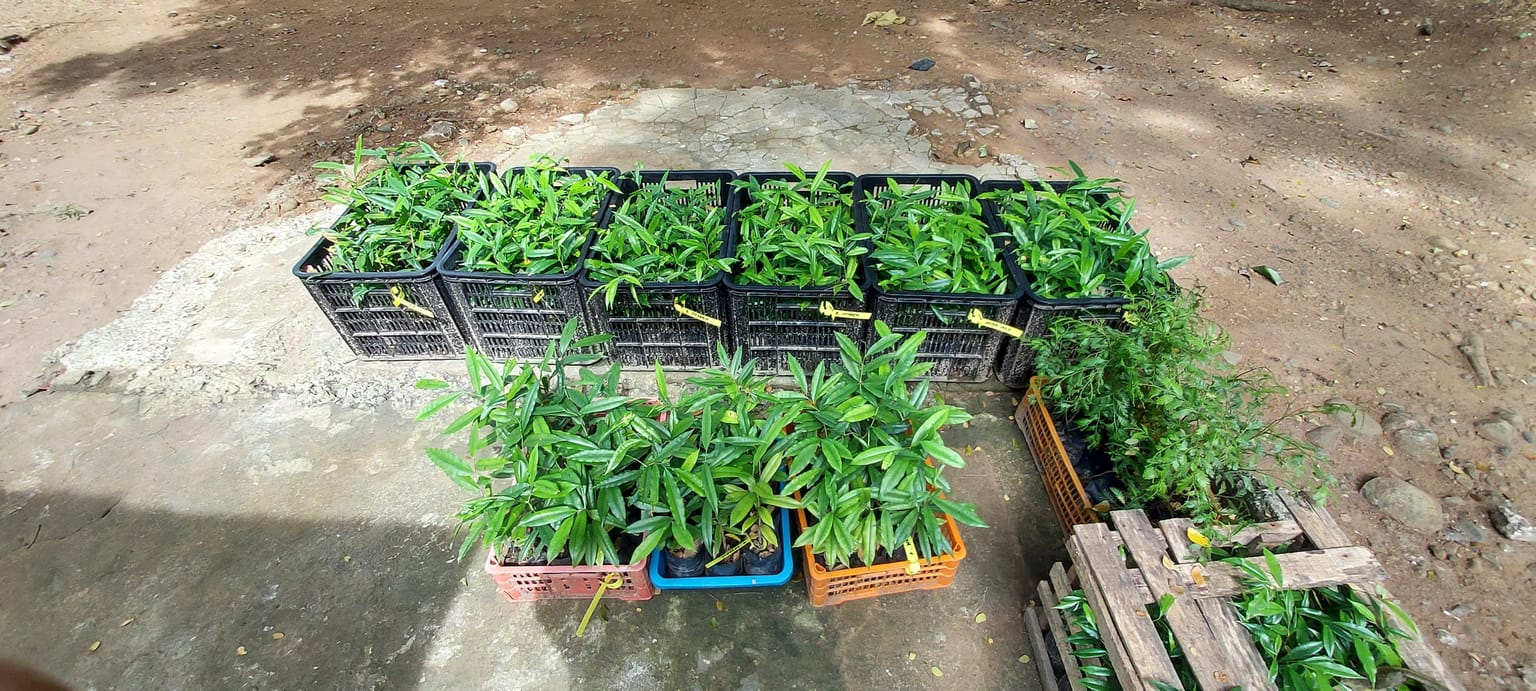
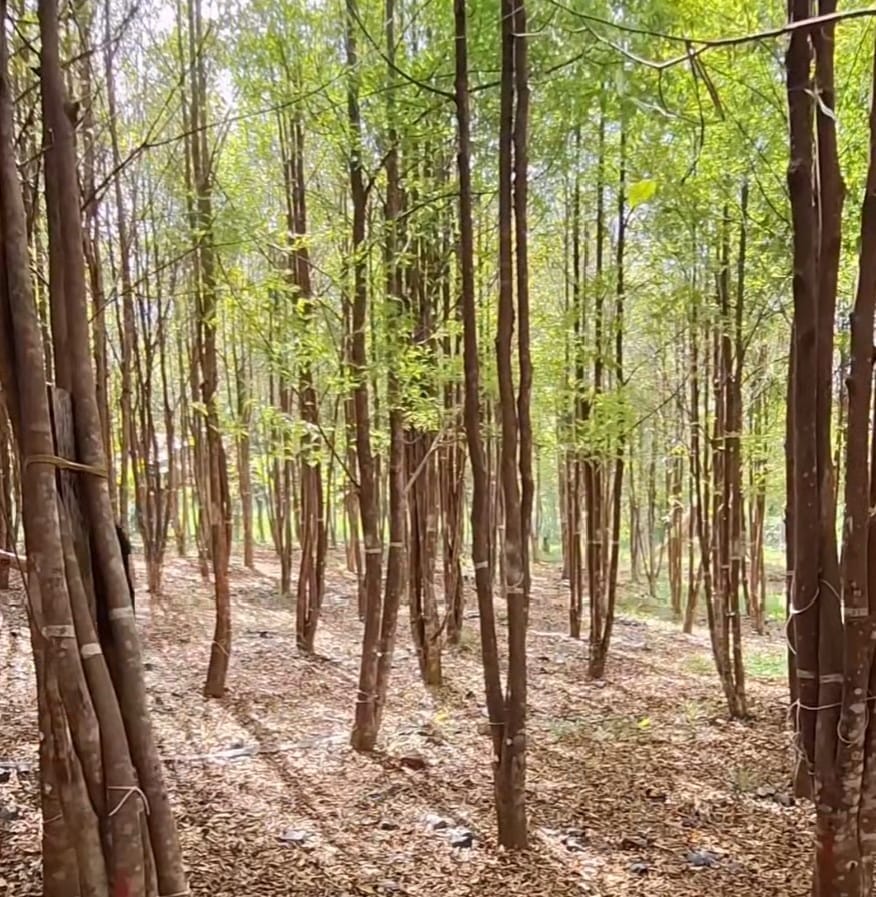
Plantation-grown Aquilaria, tagged for monitoring — the only supply that scales without stripping the forest.
Historical and ecological evidence also shows that Aquilaria has long been part of the Philippine landscape. Field studies in Leyte documented naturally occurring Aquilaria populations, including A. malaccensis, which is considered rare and a significant new record for the island. Despite acidic and low‑nutrient soils, Aquilaria persists—demonstrating its adaptability to Philippine forest conditions. This combination of natural occurrence, climatic suitability, and ecological resilience explains why the Philippines remains one of the few countries where agarwood can be cultivated sustainably and where wild populations still exist, albeit under threat. The Philippines is indeed blessed and rich with natural resources and a rich cultural heritage.
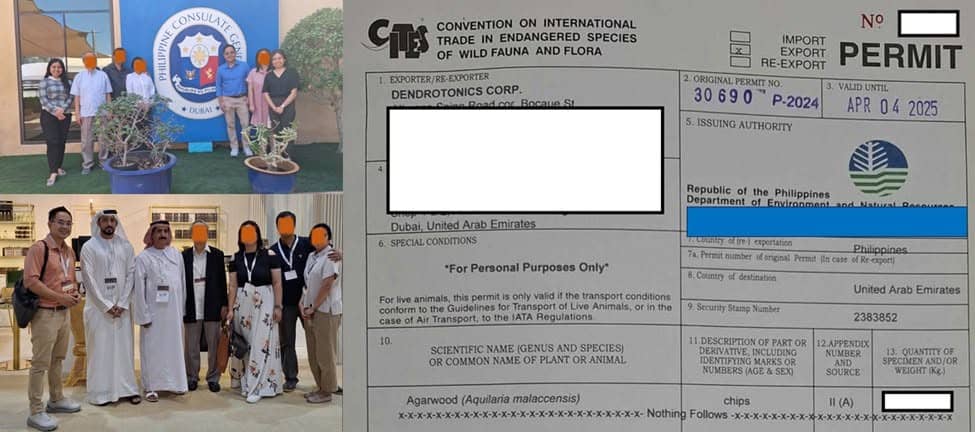
The CITES Appendix II permit behind the shipment, and the handover in Dubai.
Frequently asked
Agarwood farming in the Philippines
What are the DENR requirements for an agarwood plantation in the Philippines?
DENR allows agarwood propagation but regulates it closely. In practice a plantation needs a Wildlife Culture Permit under RA 9147 for the farm site, legally sourced planting stock from a permitted nursery, registration of the planted stand (Certificate of Tree Plantation Ownership), the appropriate harvest authority for the land tenure, transport documentation for moving material, and a CITES export permit for any shipment abroad — Aquilaria malaccensis is listed on CITES Appendix II. Collecting seed from wild stands for commercial purposes is not permitted, and importing exotic Aquilaria species requires Secretary-level approval. Requirements are revised periodically, so confirm the current set with your DENR regional office and the Biodiversity Management Bureau before you plant or harvest.
How long does it take to grow agarwood in the Philippines?
For traditional technology and inoculation, this takes roughly from 7 years to a decade end-to-end. Seedlings spend 10–12 months in the nursery, then need about 5–8 years in the field to reach the 15–20 cm DBH that makes inoculation worthwhile, followed by 24–36 months of incubation after inoculation before harvest. Site quality, spacing and pest pressure move that window more than anything else. Dendrotonics uses fast-growth technologies and perpetual harvesting to reduce the time to first harvest to roughly 3–5 years, and to allow you to perform multiple harvests from the same tree. You don't have to kill your trees to profit. Ask us how, consult now.
What is the lapnisan tree?
Lapnisan is the Philippine common name for Aquilaria malaccensis, the tree that produces agarwood. Healthy lapnisan wood is pale and nearly odourless; agarwood only forms where the tree has been wounded and showcases the tree's resilience by forming a defensive response to fungal infection and responds by depositing aromatic oleoresin in its xylem.
How does agarwood inoculation technology work?
Bore holes 6–10 mm across are drilled into the trunk at roughly 45° downward in a helical pattern, spaced 15–20 cm apart. Each hole is dosed by syringe with an inoculant and sealed with antiseptic beeswax. The fungal colonisation triggers the tree to synthesise sesquiterpenes and chromones around the wound, and that oleoresin accumulates over 24–36 months into the dark resinous wood that is harvested. Dendrotonics proudly presents the first Filipino-made agarwood inoculant, which is a proprietary blend of fungi and bacteria that is tuned to the local climate and the Philippine native Aquilaria tree species. The inoculant is applied in a way that maximises resin production while minimising tree stress, and the process is designed to be repeatable for multiple harvests from the same tree.
What is agarwood worth per kilo in the Philippines?
Documented prices of high-grade agarwood fetch up to $100,000 USD per kilogram. In the Philippines, agarwood prices range from PHP 25,000 (wholesale) to PHP 6M per kilo (wild high-grade agarwood). Agarwood is graded, not weighed: value is driven by resin content (whether a piece sinks in water), colour depth and continuity, aroma profile and piece size, and the spread between low-grade chips and sinking-grade material is orders of magnitude, not percentages.
Is agarwood a good investment in the Philippines?
For traditional technology and inoculation, this takes roughly from 7 years to a decade end-to-end. Seedlings spend 10–12 months in the nursery, then need about 5–8 years in the field to reach the 15–20 cm DBH that makes inoculation worthwhile, followed by 24–36 months of incubation after inoculation before harvest. Dendrotonics uses fast-growth technologies and perpetual harvesting to reduce the time to first harvest to roughly 3–5 years, and to allow you to perform multiple perpetual harvests from the same tree which you can give as your pamana for your family and future generations. You don't have to kill your trees to profit. Help us reforest the Philippines. Curious? Consult now.
Written as general guidance for planning, not as legal advice. Aquilaria is a regulated and CITES Appendix II species; confirm current permit requirements with your DENR regional office and the Biodiversity Management Bureau before planting, harvesting or exporting.